Landairsea GPS uses SilverCloud software portal to allow its users track and manage their GPS tracking devices in real time. The SilverCloud portal has tons of useful features and functionalities to make the best use of your GPS tracking device. However for new users the interface may seem a little daunting at first sight.
This LandAirSea 54 user guide/review of SilverCloud desktop application covers tools and settings related to some of the useful and common features like real time tracking, setting up alerts, report generation and changing other default settings in easy to follow steps.
SilverCloud Portal
Once you have activated your LandAirSea GPS tracker, head over to the portal and enter your login information on the top right corner of the screen to access your personal dashboard. The username and password remain the same which you entered while registering/activating the unit.
You will be presented with a full windowed satellite map of the location where your GPS tracker is situated. The tracker is marked with a car icon and is labeled with the 10 digit serial number. The upper left hand side of the screen shows the map control box which lets you switch on/off different map layers or features on the map. For example you can choose to view the map with traffic information, geofences, waypoints and trails. You can also turn on/off labels and set the view to best fit. There is a vertical slider on the side which lets you smoothly zoom in and out of the map.
Real Time Monitoring
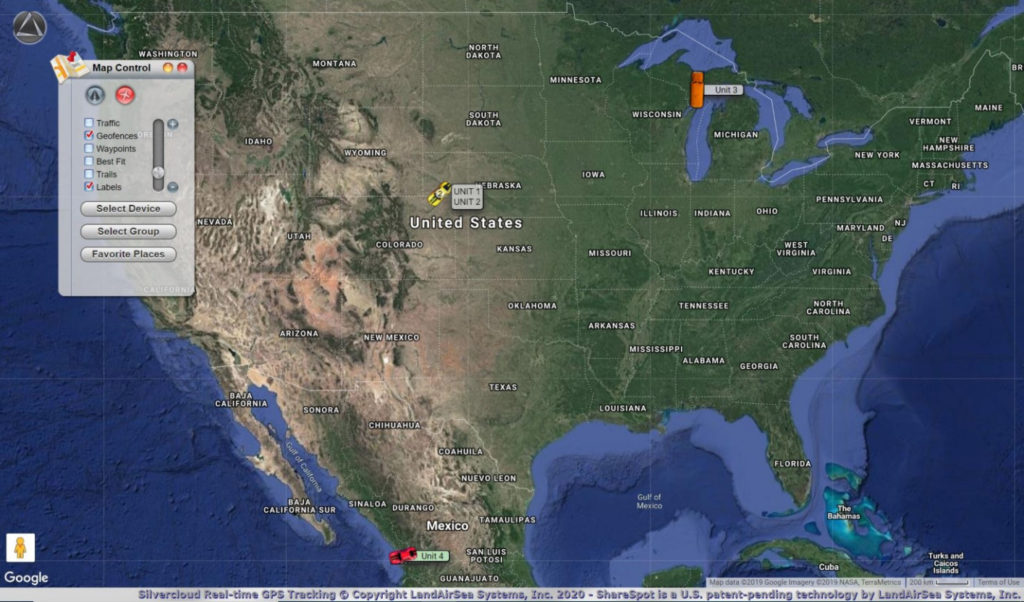
GPS tracking in real time is the hallmark feature of an active GPS tracking device. It is also the most important feature of the SilverCloud app. It gives the user live tracking functionality and provides real time data such as device name, location, coordinates, speed, direction of heading, time and so on. By default the device will be labeled with its 10 digit serial number. You can change the name of the unit for better identification and personalization.
To assign a new name for your device click the LandAirSea logo on top left side and select device editor. Choose your device from the dropdown and assign a name, icon or group to your GPS tracker.
Historical playback
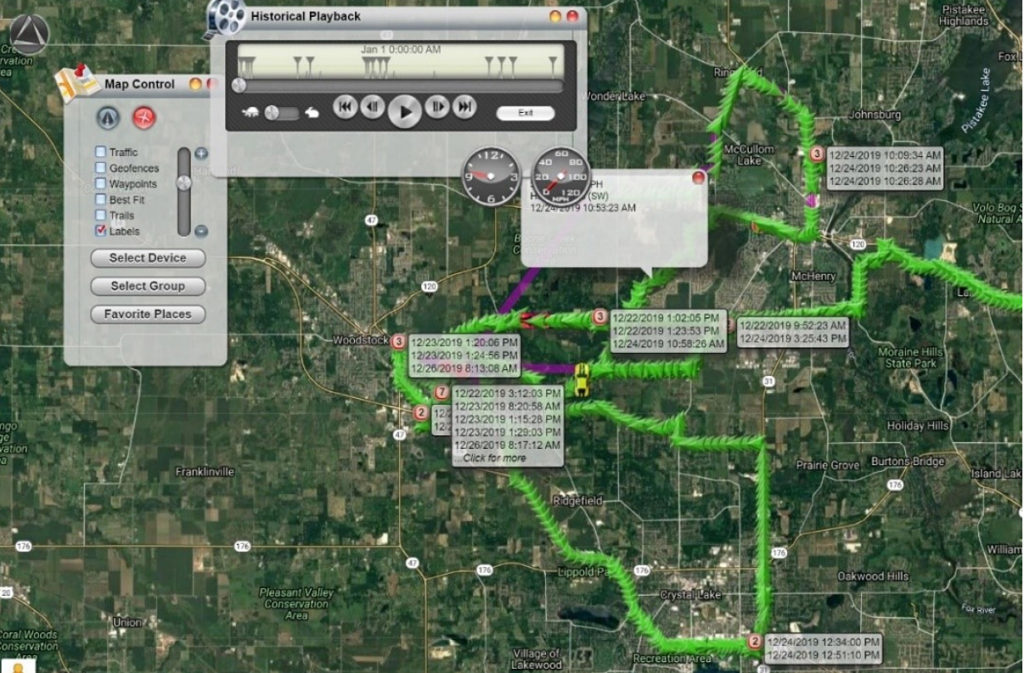
Historical playback as the name suggests gives an animated replay of all the locations covered by the tracker with the particular period. Click the LandAirSea logo and select historical playback. In the dialog box choose the timeframe for which you want to view the playback and click generate.
This will display a green colored path generated by connecting all the points travelled by the GPS tracker in the selected time frame. You can use the playback control to pause, move forward or backward along the route.
Generating Reports
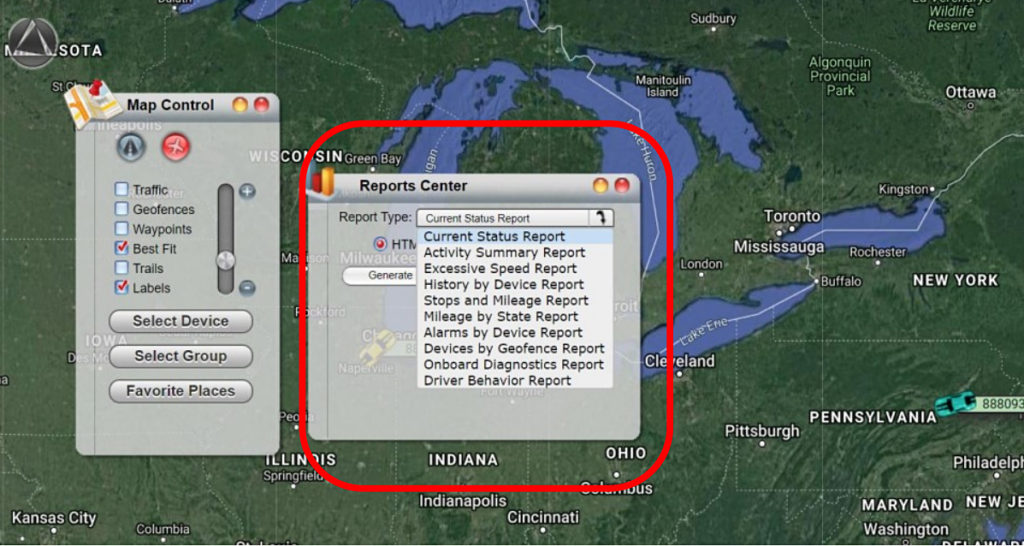
Reports are incredibly useful for fleet operators and commercial users. SilverCloud portal can generate plenty of different types of reports within just a few clicks. These reports can be downloaded in PDF, CSV and HTML formats or can also be emailed directly to someone.
Following are the different types of reports you can generate:
- Current status report – battery life, speed, last data points.
- Activity summary report – daily distance covered, movement time and stoppages.
- Excessive speeding report – shows the maximum speed of the vehicle registered.
- History be device report – time and speed positions of all the data recorded.
- Stops and mileage report – date, time stops description, distance and location
- Mileage by state report
- Alarm by device report – a report on the number of alerts raised.
- Geofences report – a report on geofence entry/exit instances.
Setting up Alerts
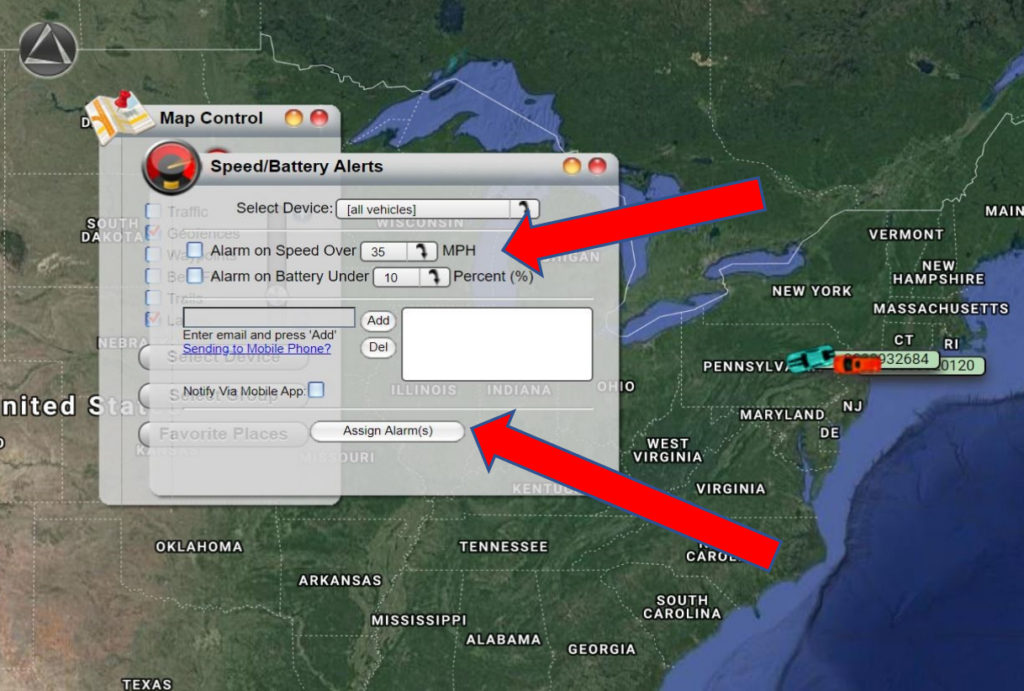
Alerts are a good way of knowing when your GPS tracker crosses a speed limit, is running low on battery power or enters/exits a geofence. To set up speed and battery alerts, click the LandAirSea logo and choose SilverCloud Alerts and then speed/battery alerts.
Specify the maximum speed and minimum battery percentage at which the tracker should alert you. Enter your Email and phone number to receive alerts at. Click Add and Assign alarms.
These are some of the essential and commonly used settings in LandAirSea desktop software. For mobile app settings and functionalities check out our LandAirSea 54 Review.
Setting up Geofences
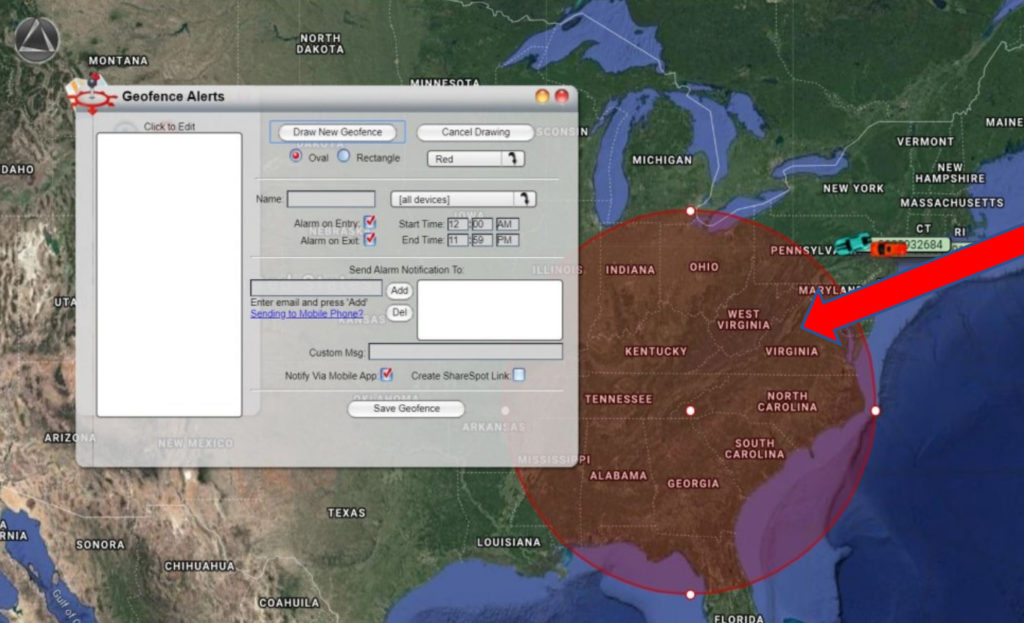
Geofences are virtual perimeters that can be drawn on a map to alert the user whenever the tracking device enters or leaves the marked area. This feature is quite standard in many leading GPS trackers these days. It is a great tool if you wish to restrict the movement of something or somebody within a particular area without having to keep checking their location from time to time.
To create a geofence, click the LandAirSea logo on the top left and click SilverCloud alerts. In the geofence alerts section select the shape of geofence area you wish to enclose and enter the email address to send the alerts to in the event of entry and exit from geofence. Click draw new geofence to create a boundary around the desired area. Here you can increase or decrease the size of the shape as well as assign a name to the geofence. You can also opt in to receive alerts directly on your phone via SilverCloud mobile app.
Favorite Places:
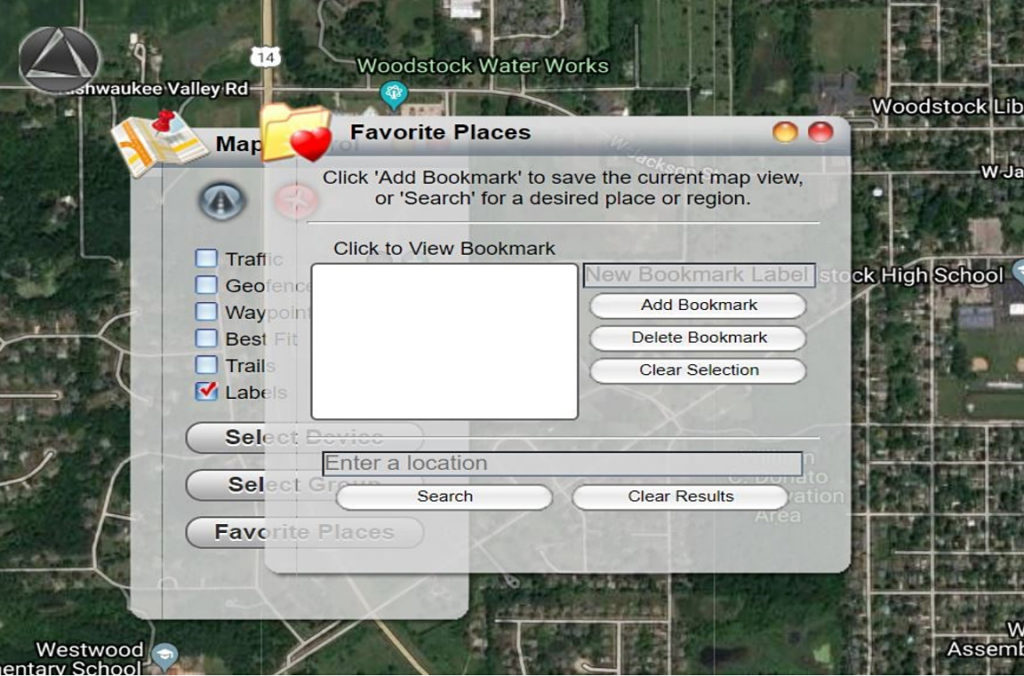
This feature lets the user bookmark any place currently displayed on the screen so that it can be quickly and easily identified on the map. Favorite places also help in generating routes if a driver needs turn by turn navigation assistance between two addresses. To mark an address as favorite place, click the LandAirSea logo, select routing and places, then favorite places. Search for the address and click add bookmark.
Routing and Direction
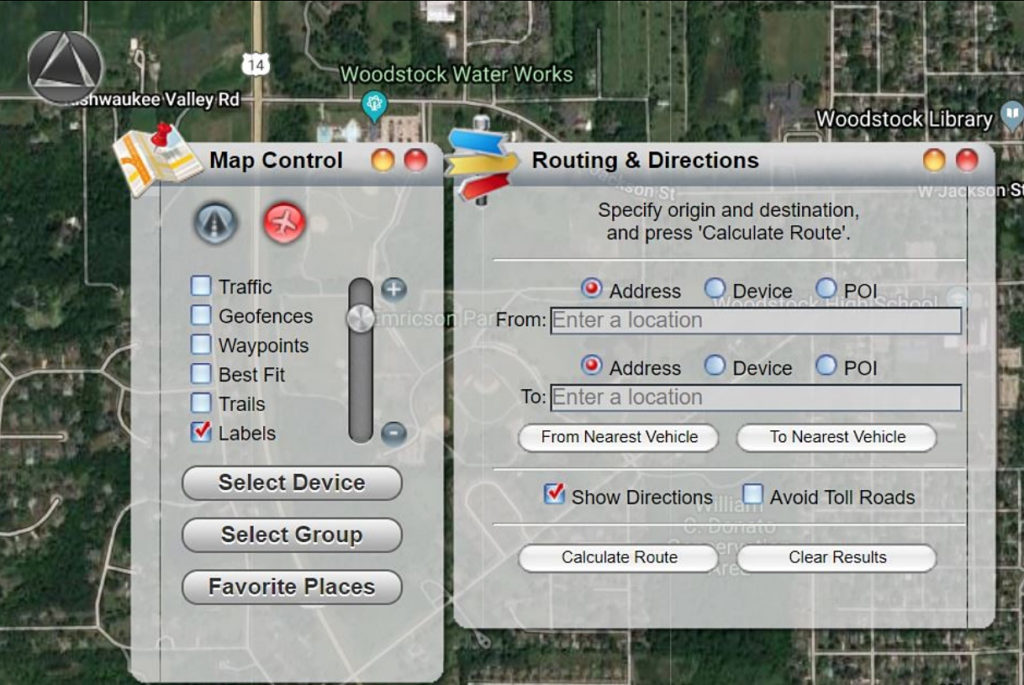
If you wish to generate a quick turn by turn route navigation from one address to other, click routing and directions from the routes and places section. Enter to and from addresses and click calculate route. This will generate a detailed turn by turn navigation guide which can easily be shared by anyone via email.
We hope this quick SilverCloud LandAirSea 54 user guide helps first time users in setting up their landairsea device. If you have any questions feel free to comment below or check out the help section of LandAirSea directly. For more information on other features and settings you can download the landairsea SilverCloud instruction manual from the link below.
