Tracki 2021 Mini Real Time GPS Tracker is a great device for keeping track of vehicles, people, pets and equipments. This post is a brief yet comprehensive Tracki Activation and Setup guide that anyone can follow and get their GPS tracker up and running in no time.
Tracki GPS tracker can be activated using the Tracki mobile app or by visiting the Tracki login portal on desktop. We are going to activate it using the latter option.
Registering your Tracki GPS Tracker:
The first step in Tracki activation process before you can start real time tracking is to register it with the Tracki user portal. Head over to Tracki Activation page and create a new account. If you have an account there just enter your username and password to login.
Tracki Dashboard
Once through you should see the Tracki dashboard with the map view on the right and settings and customization options on the left.
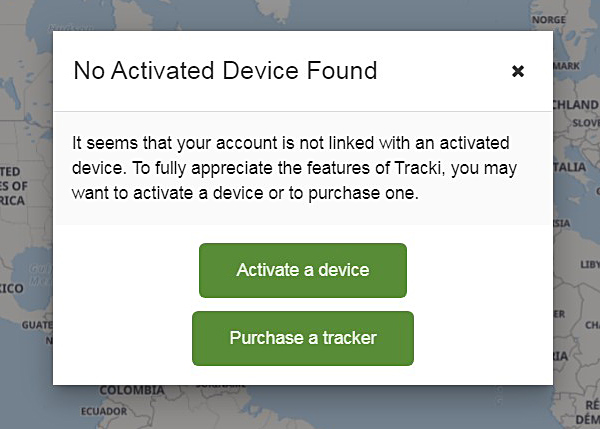
When you log into your Tracki account for the first time you should see a pop up saying ‘No activated devices found’. It gives the option to activate your Tracki or purchase a new tracker. Choose the first option to go to next step. If for some reason you don’t get the popup there is a button ‘Add Tracker’ on the left sidebar to register your device. Click it and you will be asked to enter your Tracki GPS tracker details.
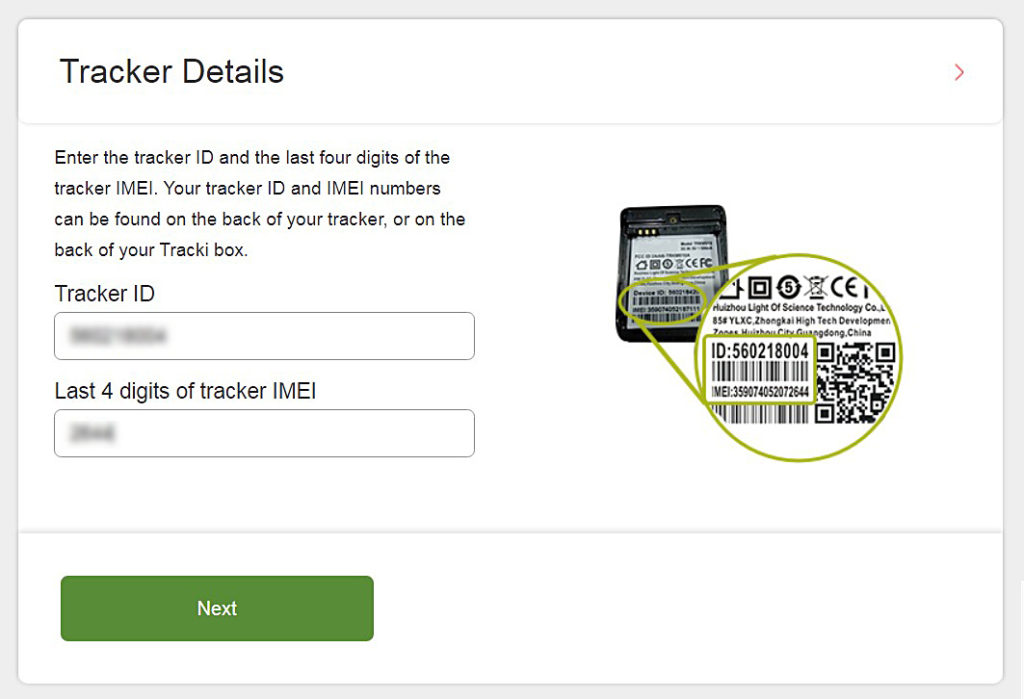
Next you are expected to enter your device’s tracker ID and last 4 digits of the IMEI number. Both of those codes can be located at the back of your Tracki GPS tracker or on the back of the box it came in. Enter those details and click Next.
Tracki Subscription Plans
The following screen presents you with the different subscription plans offered by Tracki with different time durations. Currently Tracki gives you subscription options for a period of:
- 1 month
- 6 months
- 12 months
- 24 months
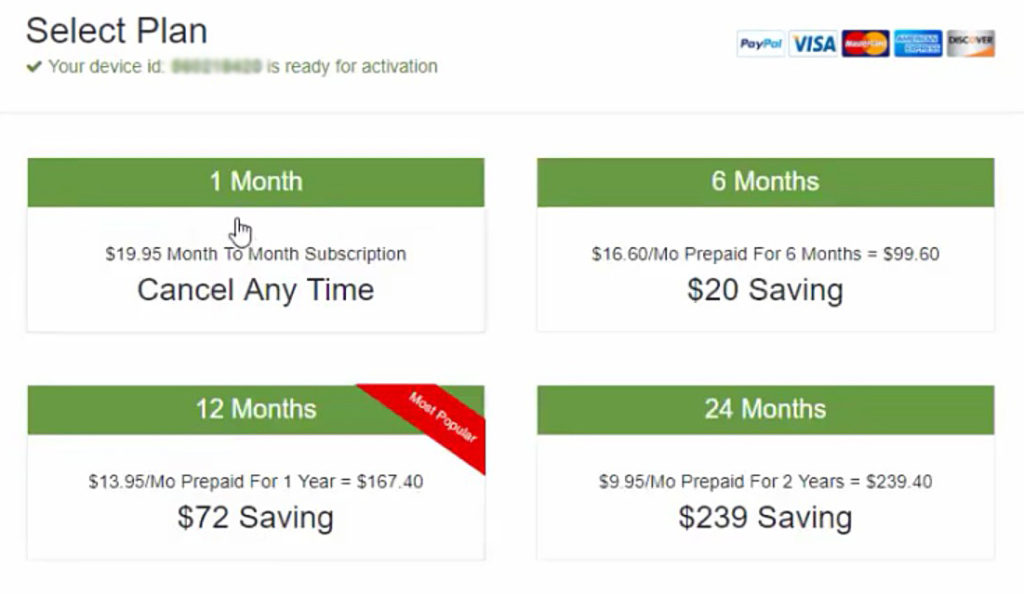
Check out our Tracki GPS Subscription Plans post for more info.
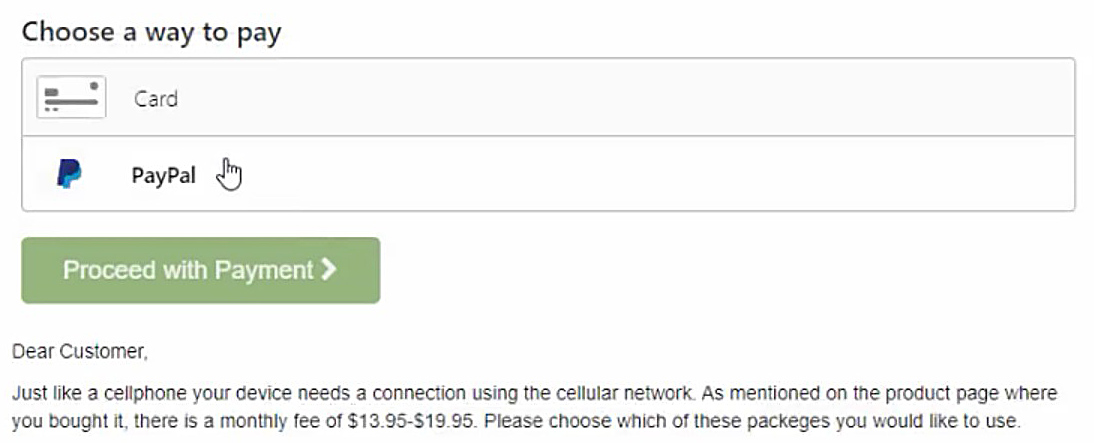
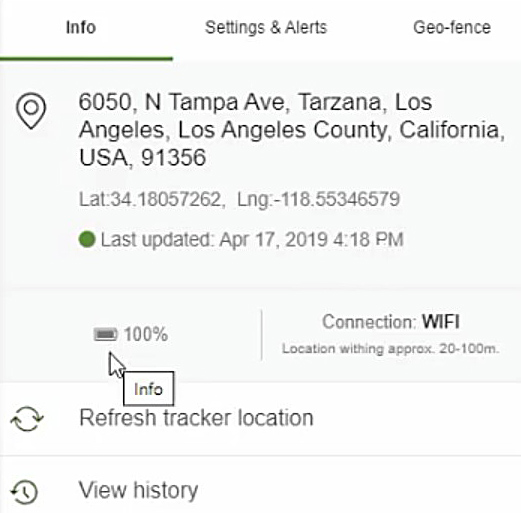
After you have chosen the plan of your choice, you can make the payment either by credit card or PayPal. Once the payment is done your tracker should be activated and displayed on the map view of your account. You can find information such as its current address, latitude, longitude, last updated time, battery status and connection type displayed in the sidebar.
Settings
The settings tab on the left side of the screen lets you customize your GPS unit. Here you can assign a name to your Tracki GPS tracker and set your location update rate. You can set the ping rate to 10 minutes, 30 minutes, 1 hour, 2 hours and 4 hours. The location update rate is the same no matter which subscription plan you are on.
Alerts
The alert section allows you to set different kinds of alerts on your device and specify how it should behave when a certain button is pressed. Different alerts that can be set are:
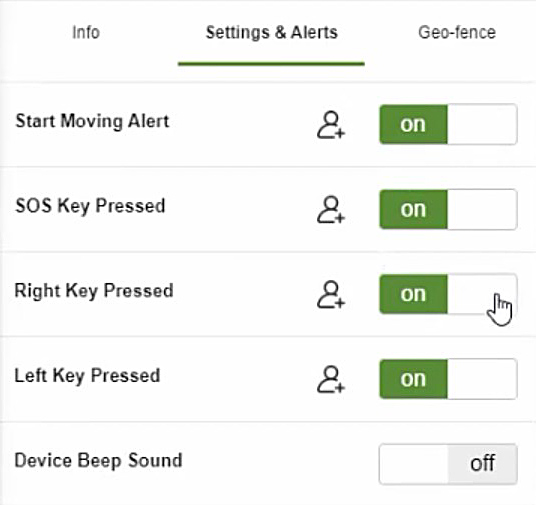
Speed alert, start moving alert, SOS alert, low battery, geofence entry/exit, left/right button press, device beep sound.
Geofence
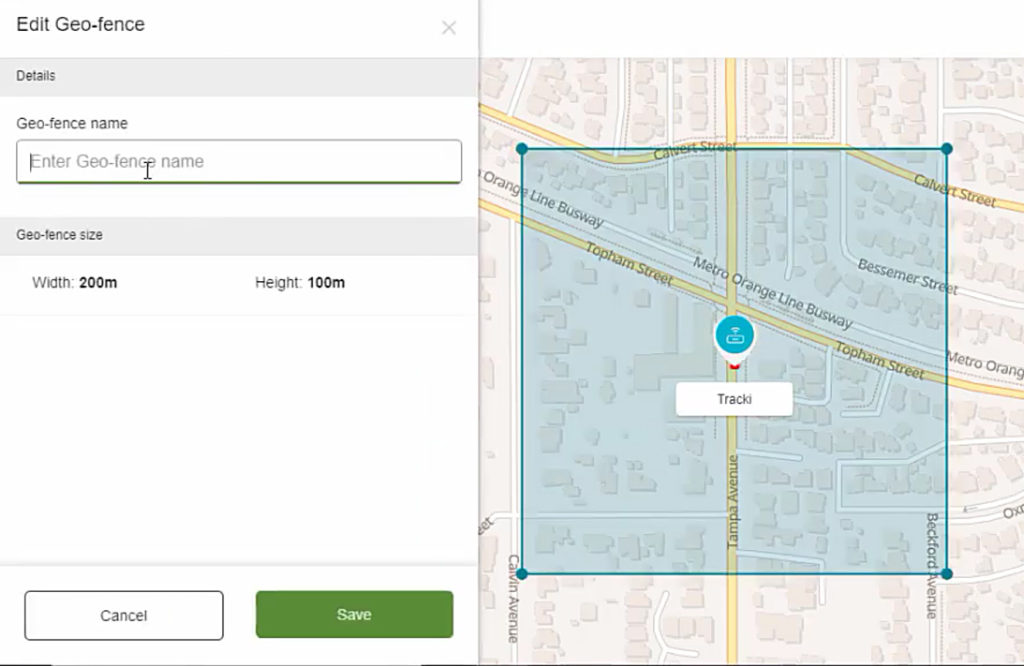
You can also add a geofence for your Tracki GPS tracker. First you need to assign a name to your new geofence. You can drag the corners of the blue rectangle shape on the map to adjust the size and position of your geofence. After saving the geofence add your tracker to it by clicking ‘add devices’ then ‘link tracker’. Click the checkbox and hit link. Now, whenever your Tracki travels in or out of this virtual boundary you will get an alert on your phone in real time.
Extended Battery Sleep Schedule
When you are using the Tracki GPS tracker for longer periods and no time to recharge its battery, you can set up a sleep schedule to conserve and extend its battery backup. You can program the device to go to sleep for 12 or 24 hours, report its location when it wakes up and go back to sleep again.
Wi-Fi Safe Zone
Familiar Wi-Fi zones like home can be assigned as safe zones. So when the tracker enters a WiFi safe zone it will stop using its cellular and GPS transmission. Upon exiting the zone it will switch back to using its GPS and GSM networks. This setting significantly increases the battery use of the device.
We hope this post helped in activating and setting up your Tracki GPS tracker.

Nice article. But I don’t see anywhere that you can enter a WiFi safe zone in the software.