
LandAirSea 54 Setup is the first thing that needs to be done before you can start using it for real time tracking. The process is fairly simple and should not take more than 10 minutes. Keep your GPS tracker’s serial number handy which will be required when registering the device.
LandAirSea 54 offers all the desirable qualities a good real time GPS tracker in this budget should have. Armed with a plethora of useful features such as built in magnetic mount, long lasting battery life and affordable subscription plan, solid build quality and compact size, no wonder this device is one of the bestselling GPS tracking devices out there for personal and business use.
This article guides through the LandAirSea 54 Activation, Setup and Installation process in easy steps that anyone can follow to get the device up and running in no time.
LandAirSea 54 Activation
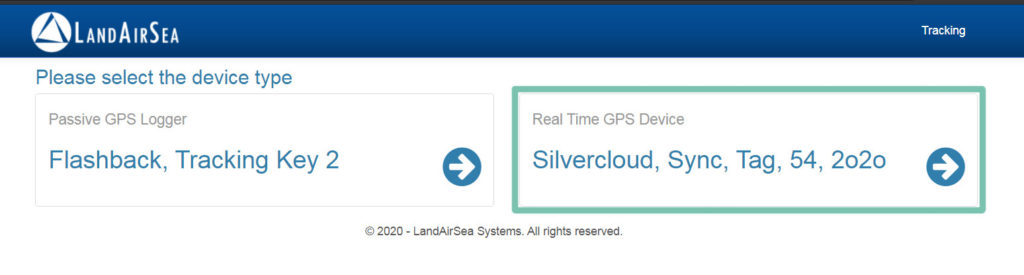
- First step in activating LandAirSea 54 is to create your account on LandAirSea Portal. Select your device type as real time GPS device which includes Silvercloud, 54, Tag and 2o2o.
- Fill in your personal details in the form including Name, username, Email address, password and phone number and hit Register new account. If you have an already registered account with LandAirSea please choose ‘I have an existing account’ to access the account dashboard.
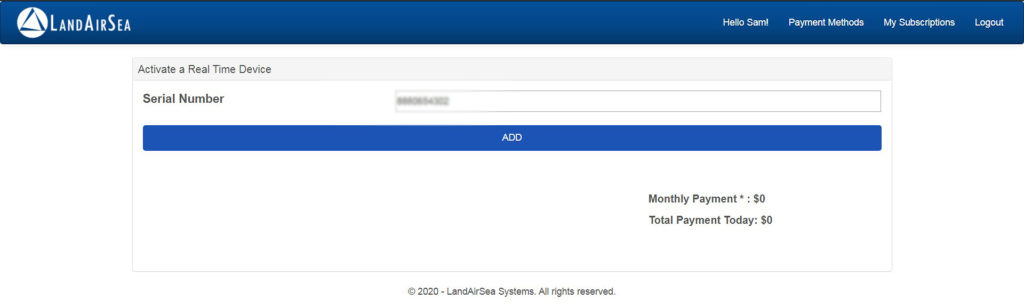
- Once you have logged in your account the next step is to register your LandAirSea GPS tracker. Type in the serial number of your device and hit add.
- Next, choose a tracking plan for your LandAirSea GPS tracker. You can choose to pay monthly, every six months, every year or every two years for which you get 5%, 10% and 15% discount respectively.
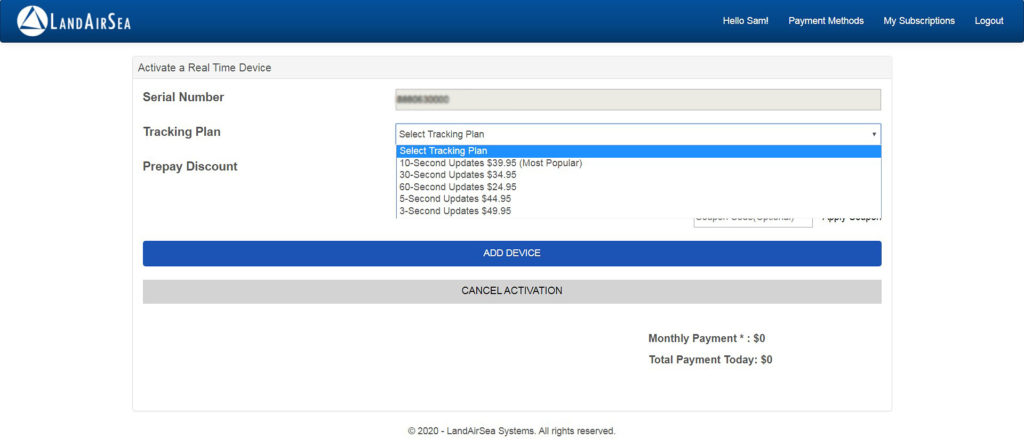
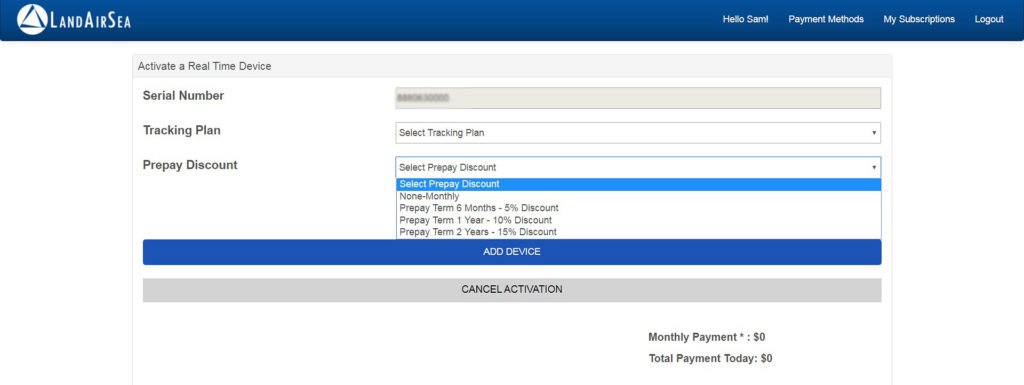
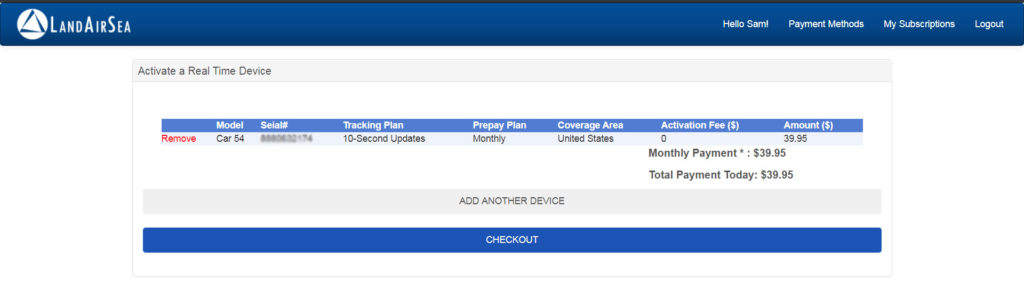
- Once you are done click ‘Add Device’ to get the total payment to be made. ( You need to add your credit card details to make the payment). Click checkout and pay the amount to register and activate your LandAirSea 54 GPS tracker.
LandAirSea 54 Installation:
When installing your LandAirSea 54 GPS tracker the only thing you need to keep in mind is that it should not be placed underneath or surrounded by metal or concrete surface. The GPS signals have no problem passing through material such as glass, plastic, carpeting, clothes or rubber.
Where to place the tracker?
If you want to use your tracking device to keep track of a moving vehicle make sure not place it anywhere where its GPS signal might get obstructed. Problem areas include space under back car seat, under the front grille or the gap between window and hood.
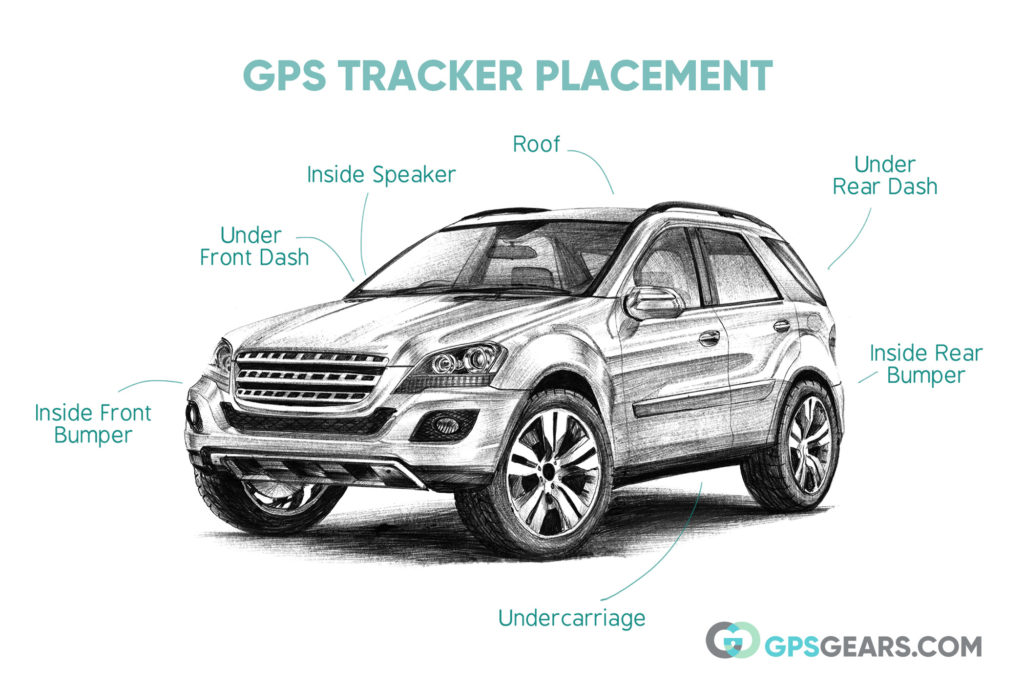
Optimal placement areas include under the front dashboard, inside front/rear bumper, under rear dash, inside the speakers, mounted on the undercarriage or the roof. For tracking people or things it is safe to place the tracker in the pocket or backpack.
LandAirSea 54 Setup
Post activation you can setup and play around with your tracker’s settings by loggin in to the SilverCloud GPS software used for tracking your device in real time. Use the same username and password you used when activating the unit.
First thing you will see is the full window satellite map and a map control button box in the upper left hand side of the screen.
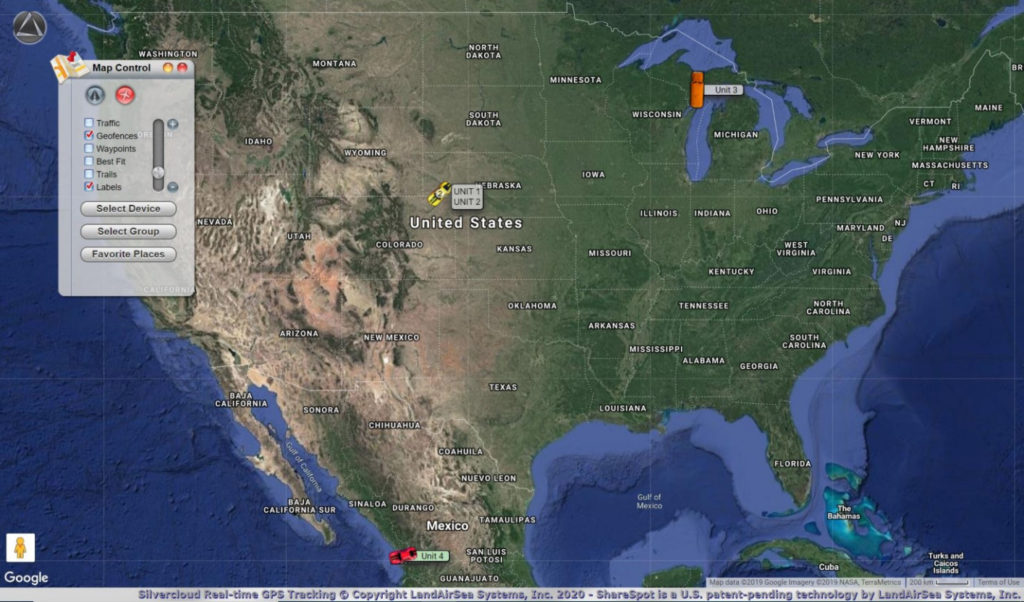
If your LandAirSea tracker is active and properly functioning it should be showing up on the map with its serial number as the label.
The map control box lets you zoom in and zoom out. You can also turn on/off different layers on the map such as traffic, geofences, waypoints, best fit, trails and labels.
Real Time Data:
If you click on your device icon on the map you should be able to see information about its approximate location, speed, direction of travel, elevation, time etc.
Customizing your tracker:
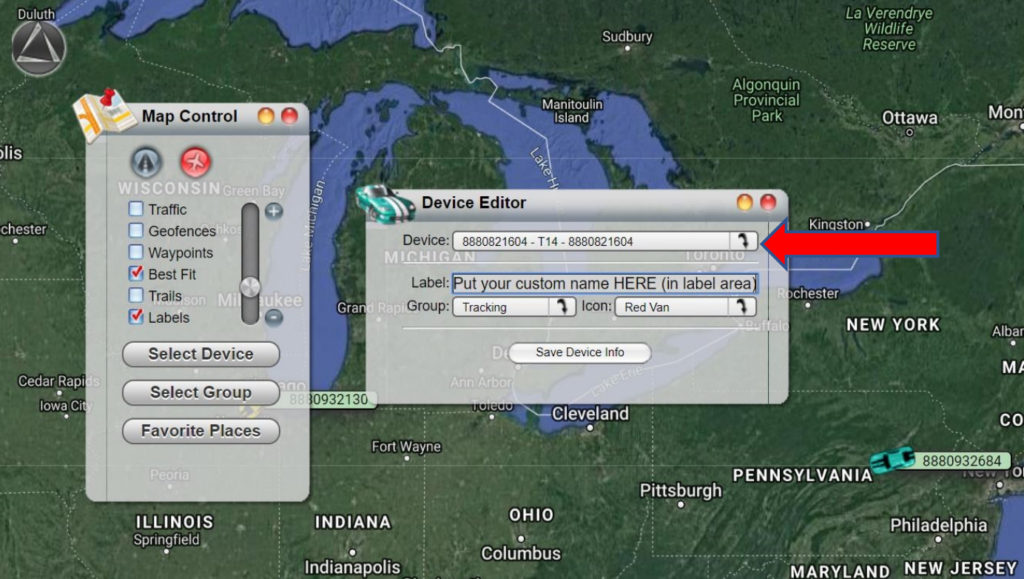
Your GPS device is displayed on the map with its serial number as the label. It is a good idea to assign a name to your LandAirSea GPS tracker especially if you have more than one tracker. It might get confusing identifying each one with their serial number.
Click on the LandAirSea logo on the top left of the screen. From the dropdown menu select device editor. Here you can rename your device and change its icon.
Setting up Alerts:
Alerts are a good way of knowing when your GPS tracker crosses a speed limit, is running low on battery power or enters/exits a Geofence. To set up speed and battery alerts, click the LandAirSea logo and choose SilverCloud Alerts and then speed/battery alerts.
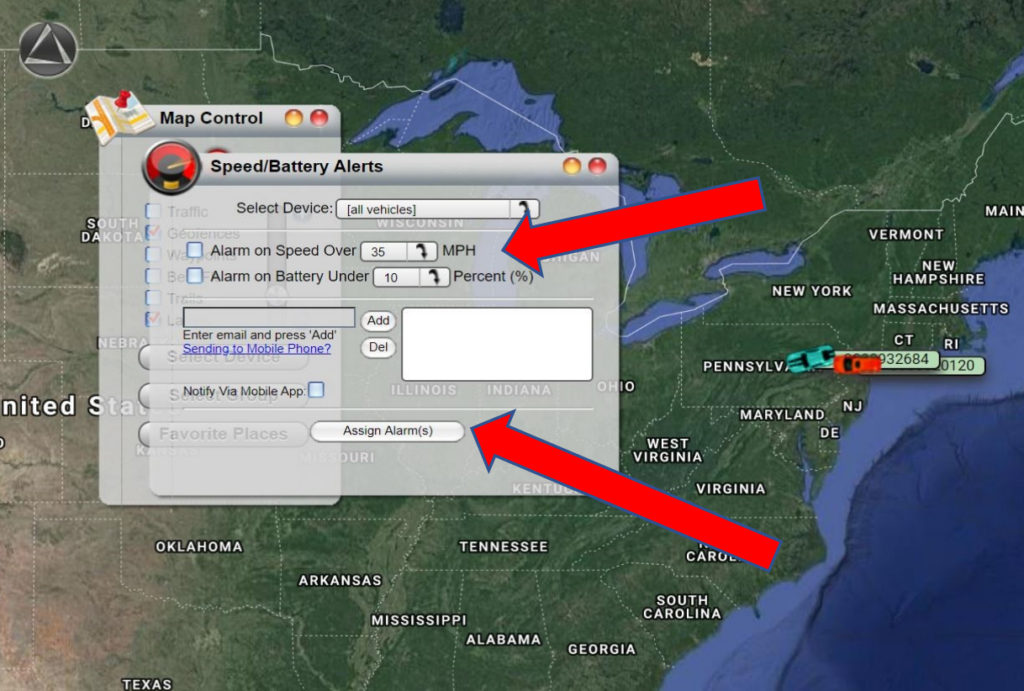
Specify the maximum speed and minimum battery percentage at which the tracker should alert you. Enter your Email and phone number to receive alerts at. Click Add and Assign alarms.
These are some of the essential and commonly used settings in LandAirSea desktop software. For mobile app settings and functionalities check out our LandAirSea 54 Review.
Hello I bought this tracker a while back and haven’t installed it yet. I don’t have the four digit code to get started. Please help.
Please check the confirmation mail received from LandAirSea at the time of purchase. If you are unable to locate it please contact LandAirSea support for help.